Jekyll2026-04-01T05:17:42-07:00https://yihengan.com/feed.xmlYiheng AnPhD Student @ Warrington College of Business, University of FloridaYiheng Anyiheng.an.usa@gmail.comLeveraging Supervised and Unsupervised Machine Learning to Study Shapes2023-02-21T00:00:00-07:002023-02-21T00:00:00-07:00https://yihengan.com/posts/2022/11/supervised-unsupervisedAs sensor technology improves, data volumes grow. We now live in a sea of data collected by our phones, smartwatches, and home assistants like Alexa. Science is not any different, new sensors are enabling the collection of large datasets that can be mined for new scientific discoveries. In plant science, sensor technology is being applied to study how plants grow under drought conditions.
We will be using data collected by the Field Scanalyzer at the University of Arizona Maricopa Agricultural Center. The Field Scanalyzer covers over an hectare of land - capturing data from over 20,000 plants over a growing season. The Field scanalyzer is equipped with stereo RGB and thermal cameras, a PSII chlorophyll fluorescence imager, and a pair of 3D laser scanners (pictured below).
Collectively, these sensors capture 20 terabytes (TBs) in a three-month period, which makes converting these raw data into information a difficult task. Accomplishing extraction of information requires leveraging machine learning, high performance computers, and distributed computing.
These data enable me and other scientists to study how plants respond to drought stress under real-world, field conditions. These data will contribute to efforts aimed at improving the resiliency of plants to drought stress.
Data
Today we will be working with 3D point cloud data collected by the Field Scanalyzer. These data provide fine-scale resolution on plant shapes. We will: (i) extract TDA shape descriptors, (ii) run PCA on these data, and (iii) classify plants into their respective variety name.
]]>Yiheng Anyiheng.an.usa@gmail.comUsing interactive data visualization to make sense of large datasets2022-11-16T00:00:00-07:002022-11-16T00:00:00-07:00https://yihengan.com/posts/2022/11/making-sense-of-dataAs sensor technology improves, data volumes grow. We now live in a sea of data collected by our phones, smartwatches, and home assistants like Alexa. Science is not any different, new sensors are enabling the collection of large datasets that can be mined for new scientific discoveries. In plant science, sensor technology is being applied to study how plants grow under drought conditions.
We will be using data collected by the Field Scanalyzer at the University of Arizona Maricopa Agricultural Center. The Field Scanalyzer covers over an hectare of land - capturing data from over 20,000 plants over a growing season. The Field scanalyzer is equipped with stereo RGB and thermal cameras, a PSII chlorophyll fluorescence imager, and a pair of 3D laser scanners (pictured below).
Collectively, these sensors capture 20 terabytes (TBs) in a three-month period, which makes converting these raw data into information a difficult task. Accomplishing extraction of information requires leveraging machine learning, high performance computers, and distributed computing.
These multiple sources of data provide a fine-scale information of plant growth under drought (decreased water) conditions. Today, we will use some of these data to learn interactive visualization using Python!
]]>Yiheng Anyiheng.an.usa@gmail.comPip install without sudo on HPC clusters2022-03-22T00:00:00-07:002022-03-22T00:00:00-07:00https://yihengan.com/posts/2022/03/pip-install-no-rootLearn how to pip install Python packages without root access.
Introduction
High performance computer (HPC) clusters are shared resources. As such, sudo/root access is denied to prevent one user from potentially harming the system or deleting data. This does make installing Linux dependencies and/or Python libraries. So how do we get around this?
Finding the default Python
When installing Python packages, it is important to know the default Python version. To find your default version, run the following command:
which python3
Which should produce an output like this:
You can check for other Python version by running:
ls-ls /usr/bin/python*
Installing Python libraries
To install packages without sudo/root access, run the following command, making sure to insert your package name:
/usr/bin/python3 -m pip install <insert package name here> --user
For example, if we wanted to install the awesome giotto-tda package, we would run:
/usr/bin/python3 -m pip install giotto-tda --user
So why does this work? Well notice the --user flag, this ensures that the package is only installed within your own user environment. This allows you to download packages without sudo/root access on HPC systems and servers. Give it a try!
]]>Yiheng Anyiheng.an.usa@gmail.comPhenomic Data Exploration2022-03-21T00:00:00-07:002022-03-21T00:00:00-07:00https://yihengan.com/posts/2022/03/phytooracle-data-explorationExplore field scanalyzer multimodal phenomic data!
Introduction
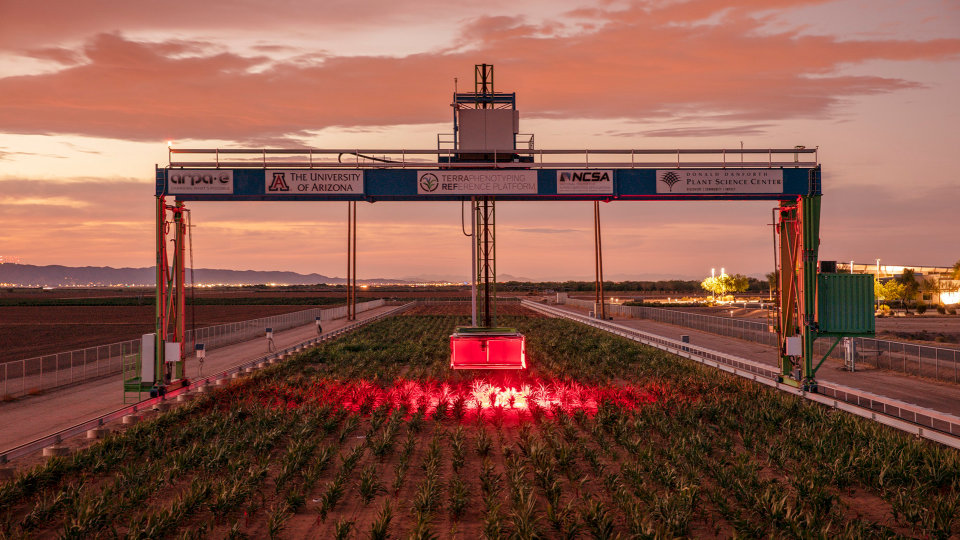
The field scanalyzer at the University of Arizona Maricopa Agricultural Center is a multimodal phenotyping platform that travels along rails and captures images and point clouds of thousands of plants. These data are processed using PhytoOracle distributed processing pipelines. Given the size of raw data, all field scanalyzer data types are processed on the University of Arizona high performance computer cluster.
Figure 1. The field scanalyzer is an outdoor plant phenotyping platform at the University of Arizona Maricopa Agricultural Center.
Sensors enclosed within the sensor box include stereo RGB and thermal cameras, a PSII chlorophyll fluorescence imager, and a pair of 3D laser line scanners. All sensors collect data at the full field scale, except PSII chlorophyll fluorescence which collects data at the center of each agricultural plot.
Figure 2. (A) The field scanalyzer covers a 1 hectare field. (B) The platform collects RGB, thermal, PSII chlorophyll fluorescence, and 3D laser scanner data. (C) The raw data is sensor dependent, ranging from 5-350 GBs. All sensor data is captured at the full field scale, except for PSII chlorophyll fluorescence which captures data from the center of each agricultural plot. (D) Raw sensor data is temporarily stored on a cache server, where it is programmatically compressed and uploaded onto CyVerse. Compressed data is downloaded, processed, and outputs transferred on the UA high performance clusters.
Irrigation treatment & weather data
Figure 3. Volumetric water content (%) over the course of the growing period. For each collection, measurements were taken at depths 10, 30, 50, 70, and 90 cm. Each point represents the mean value of two measurements.Figure 4. Weather data throughout the growing period collected by the Arizona Meteorological Network (AZMET).
Test dataset
To download our numerical, tabular test dataset, click here. This dataset contains RGB, thermal, PSII chlorophyll fluorescence, and 3D line scanner phenotypic trait data. For a full description of the dataset, click here. The figures below show only those lettuce types included in the test dataset, although you can click on other lettuce types to see their trends by clicking on each figure’s legend.
To download our point cloud test dataset in an archived, compressed “tar.gz” format , click here. To access the same data in an uncompressed Google Drive folder, click here.
Mophological phenotypes
RGB
Figure 5. Bounding area time series showing plant development over the growing period. Errors bars represent the 95% CI around the mean. Means represent the phenotypic average of a lettuce type, including all genotypes and their respective replicates within a treatment.
3D laser scanner
Figure 6. Height time series showing plant development over the growing period. Errors bars represent the 95% CI around the mean. Means represent the phenotypic average of a lettuce type, including all genotypes and their respective replicates within a treatment.
Physiological phenotypes
Thermal
Figure 7. Canopy temperature over the growing period. Errors bars represent the 95% CI around the mean. Means represent the phenotypic average of a lettuce type, including all genotypes and their respective replicates within a treatment.
PSII chlorophyll fluorescence
Figure 8. Maximum quantum effiiency of PSII (FV/FM) over the growing period. Errors bars represent the 95% CI around the mean. Means represent the phenotypic average of a lettuce type, including all genotypes and their respective replicates within a treatment.]]>Yiheng Anyiheng.an.usa@gmail.comSetting up iRODS2022-01-31T00:00:00-07:002022-01-31T00:00:00-07:00https://yihengan.com/posts/2022/01/irods-setupLearn how to install and use the Integrated Rule-Oriented Data System (iRODS).
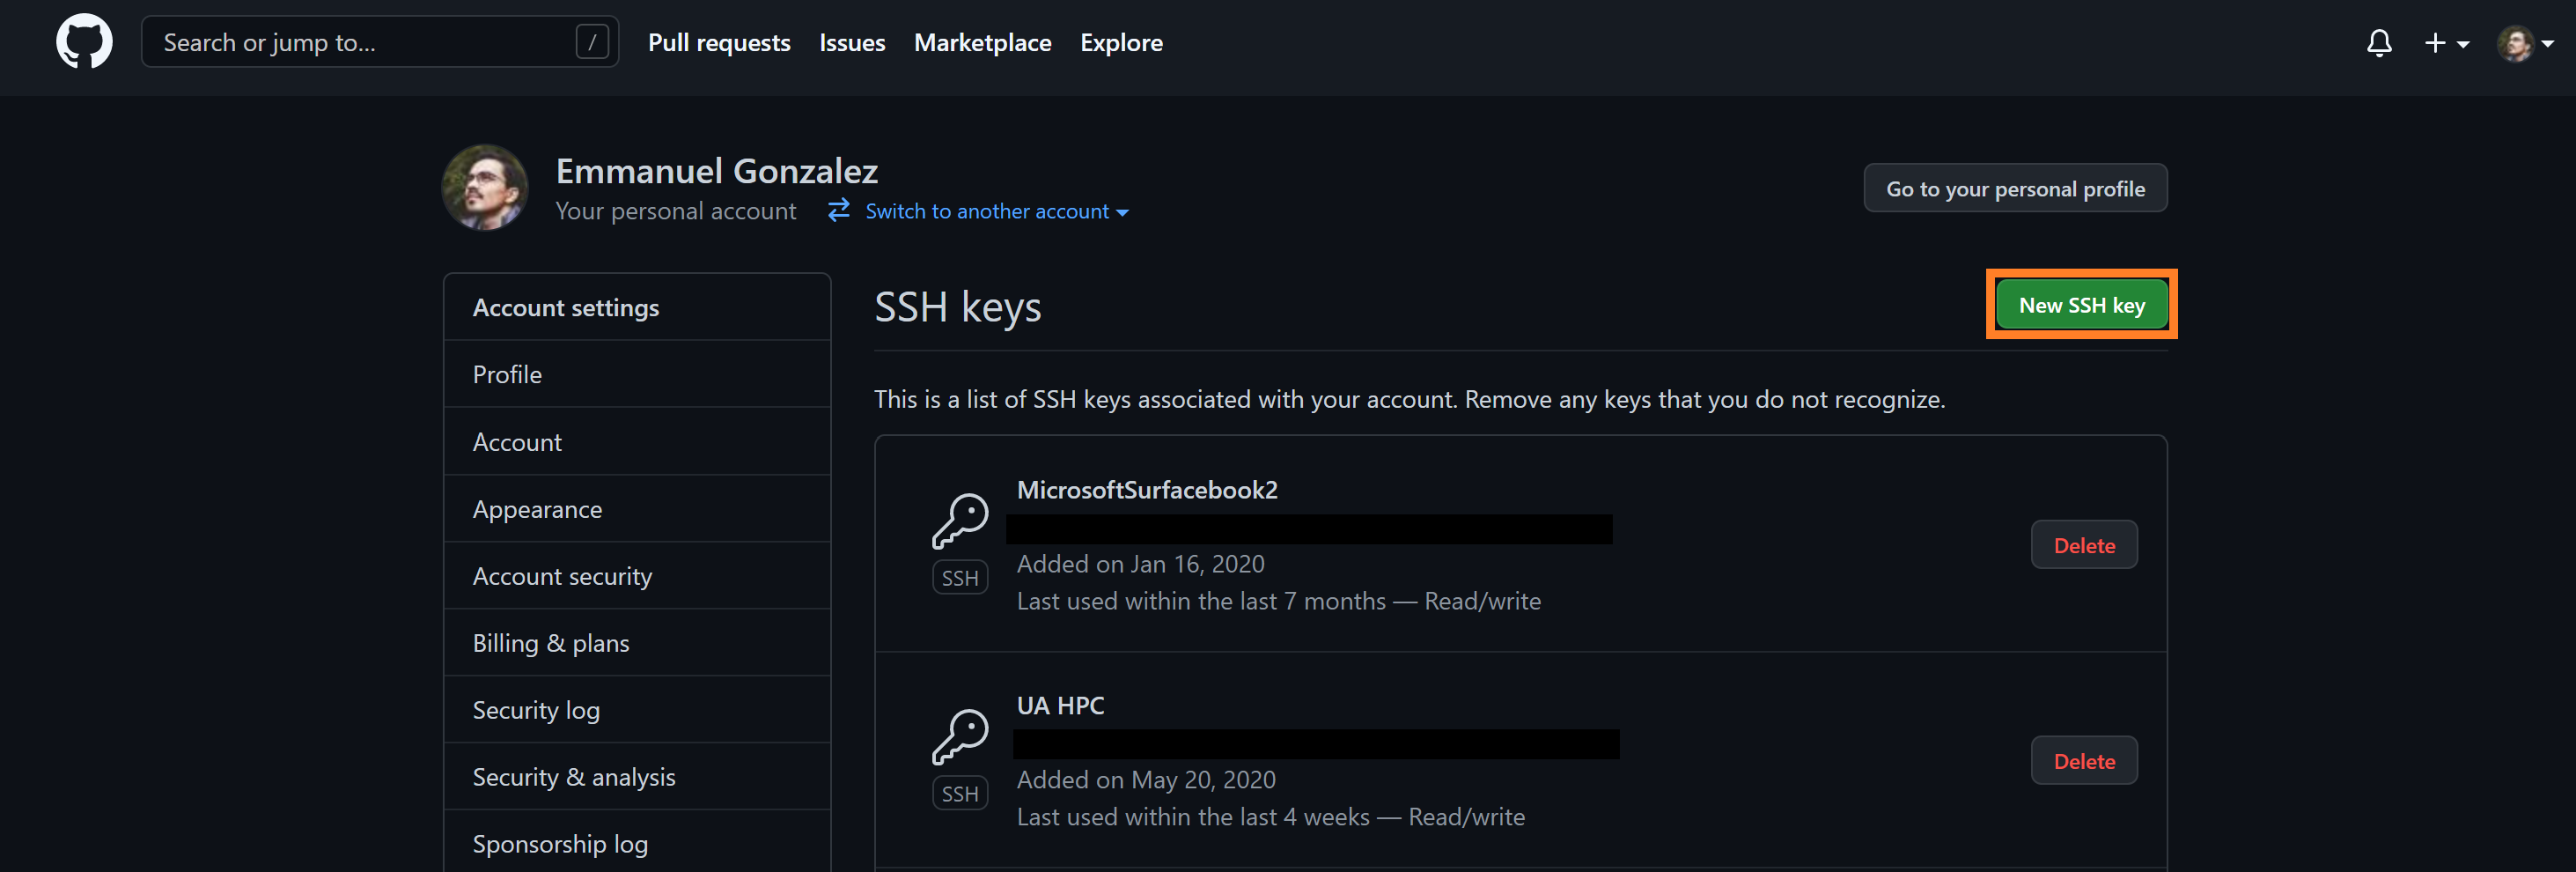
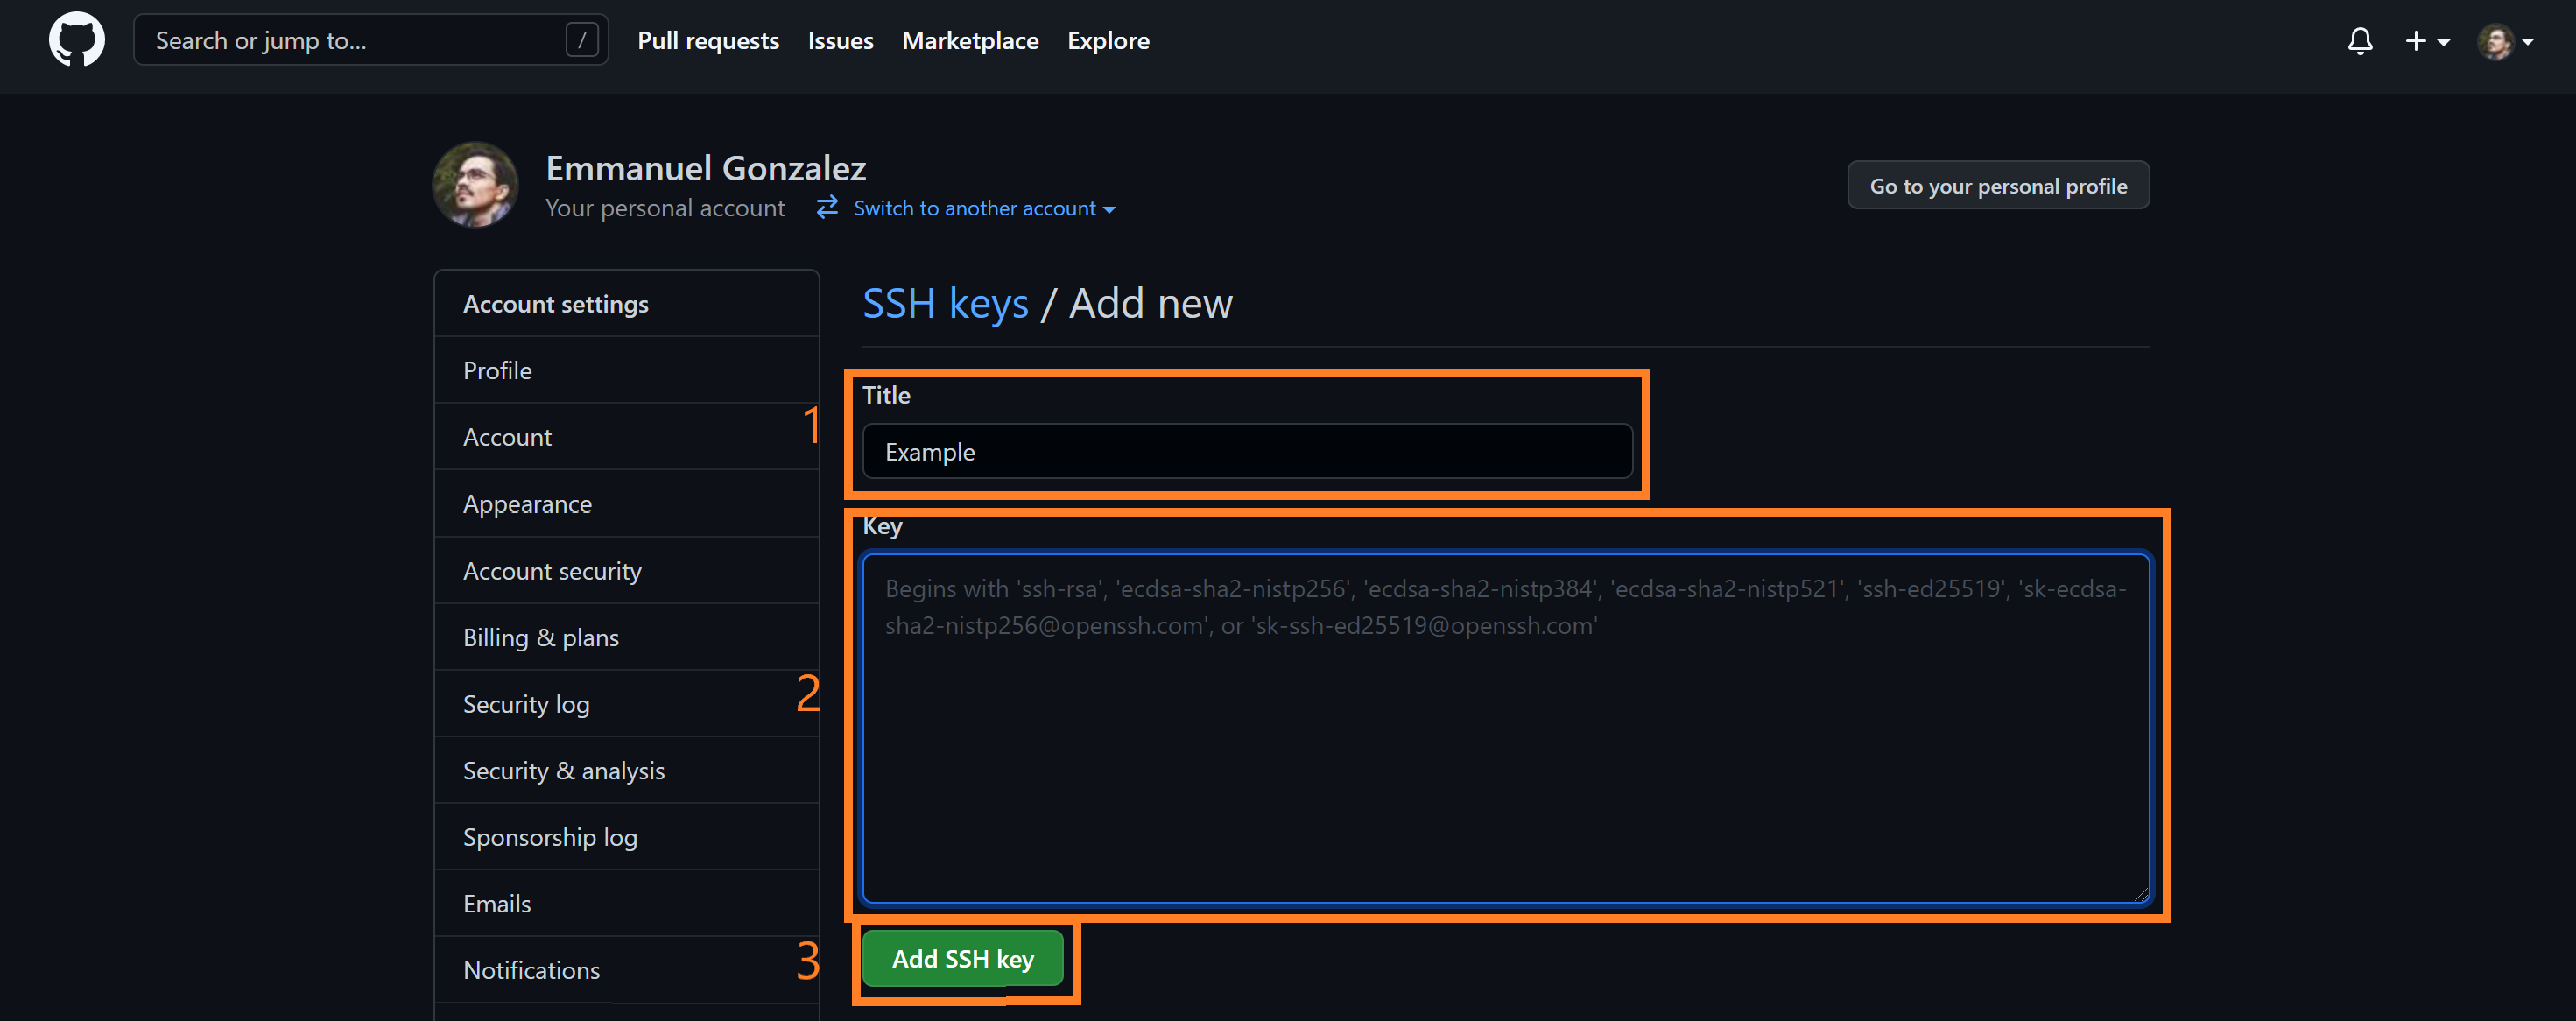
iRODS is open source data management software used by research groups, such as CyVerse. This software provides access to data on the terminal, whether that be your local computer or a high performance computer (HPC). Below are the steps to getting iRODS installed on your machine and an example of a data download.
It’s recommended to use the -KT flags, as it prevents errors due to internet connectivity. To see a full list of other flags/options, click here.
]]>Yiheng Anyiheng.an.usa@gmail.comCreating an academic website on GitHub2021-10-04T00:00:00-07:002021-10-04T00:00:00-07:00https://yihengan.com/posts/2021/10/academic-pagesLearn how to create a website to showcase your academic achievements!
This tutorial will walk you through setting up an academic website on GitHub. You can add publications, blog posts, and a CV to your website to share with people as you network! We will get some more practice with the terminal by interacting with the Git command line interface (CLI).
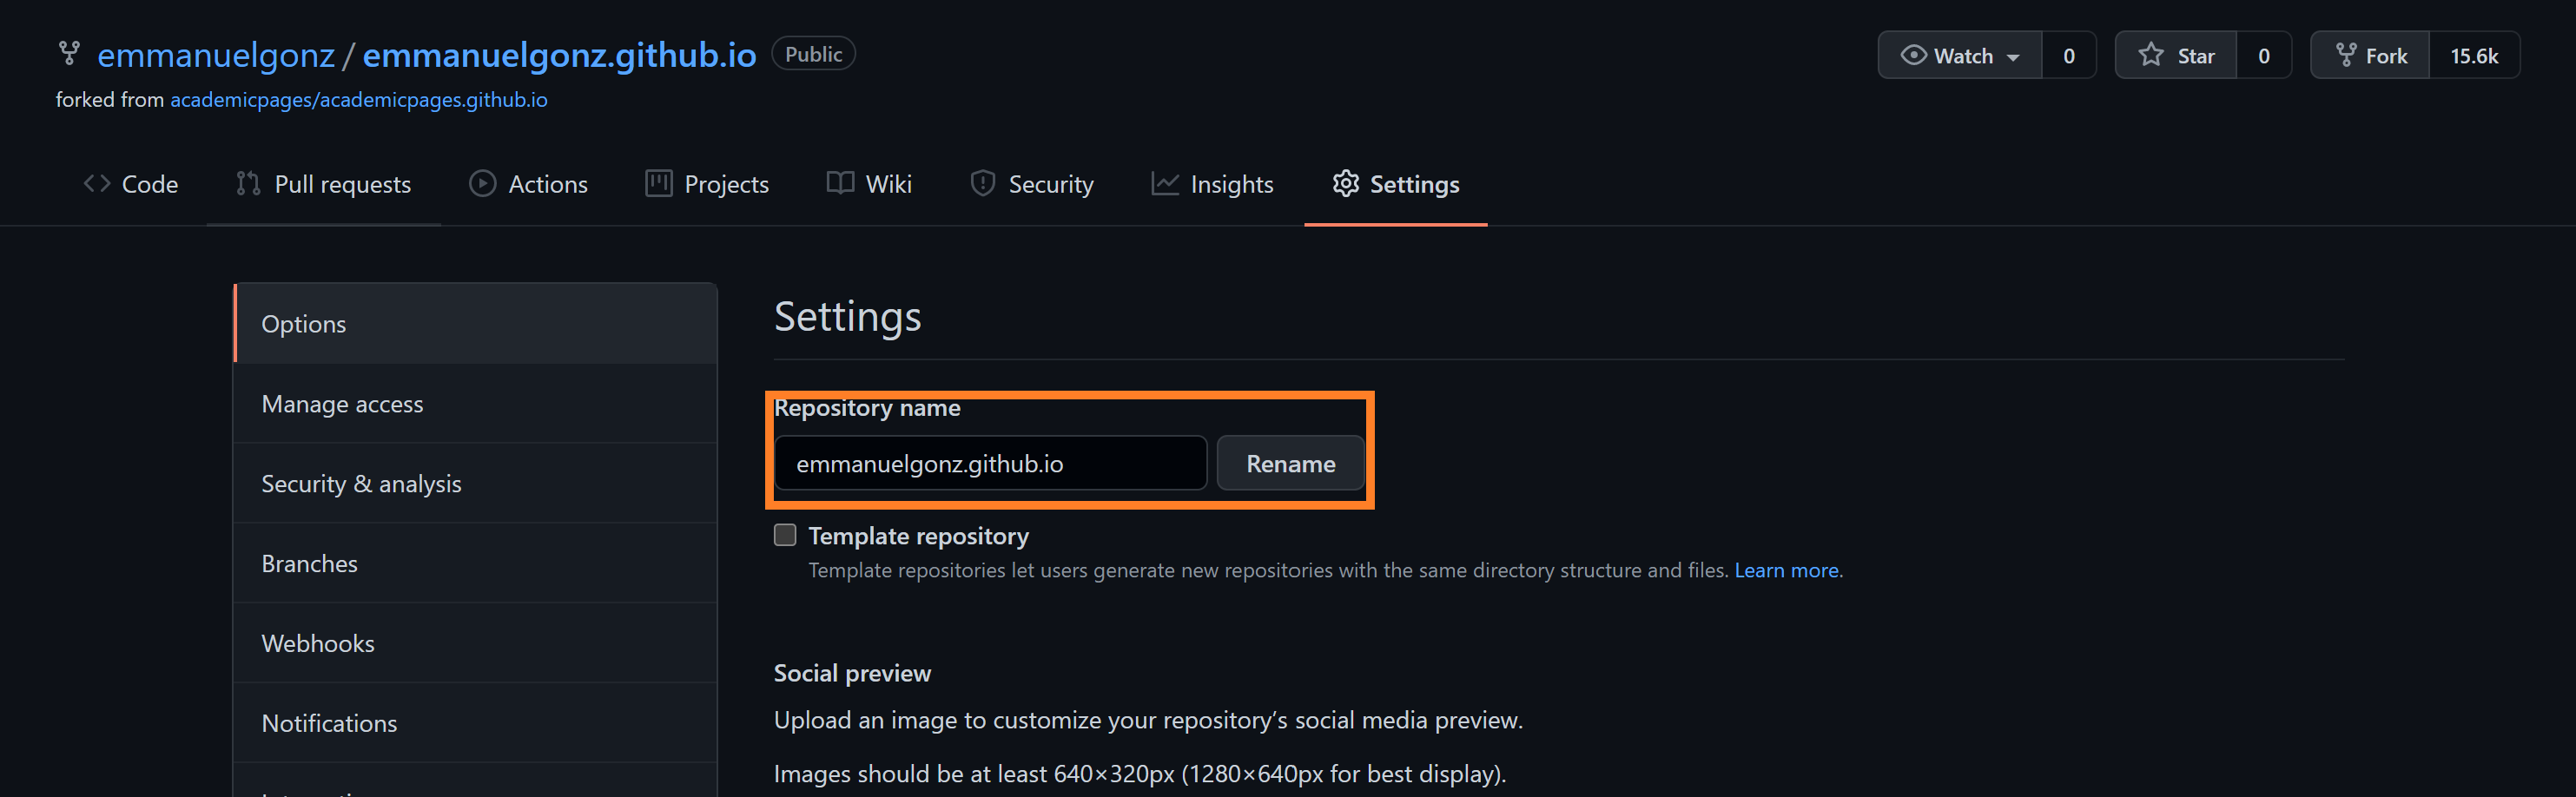
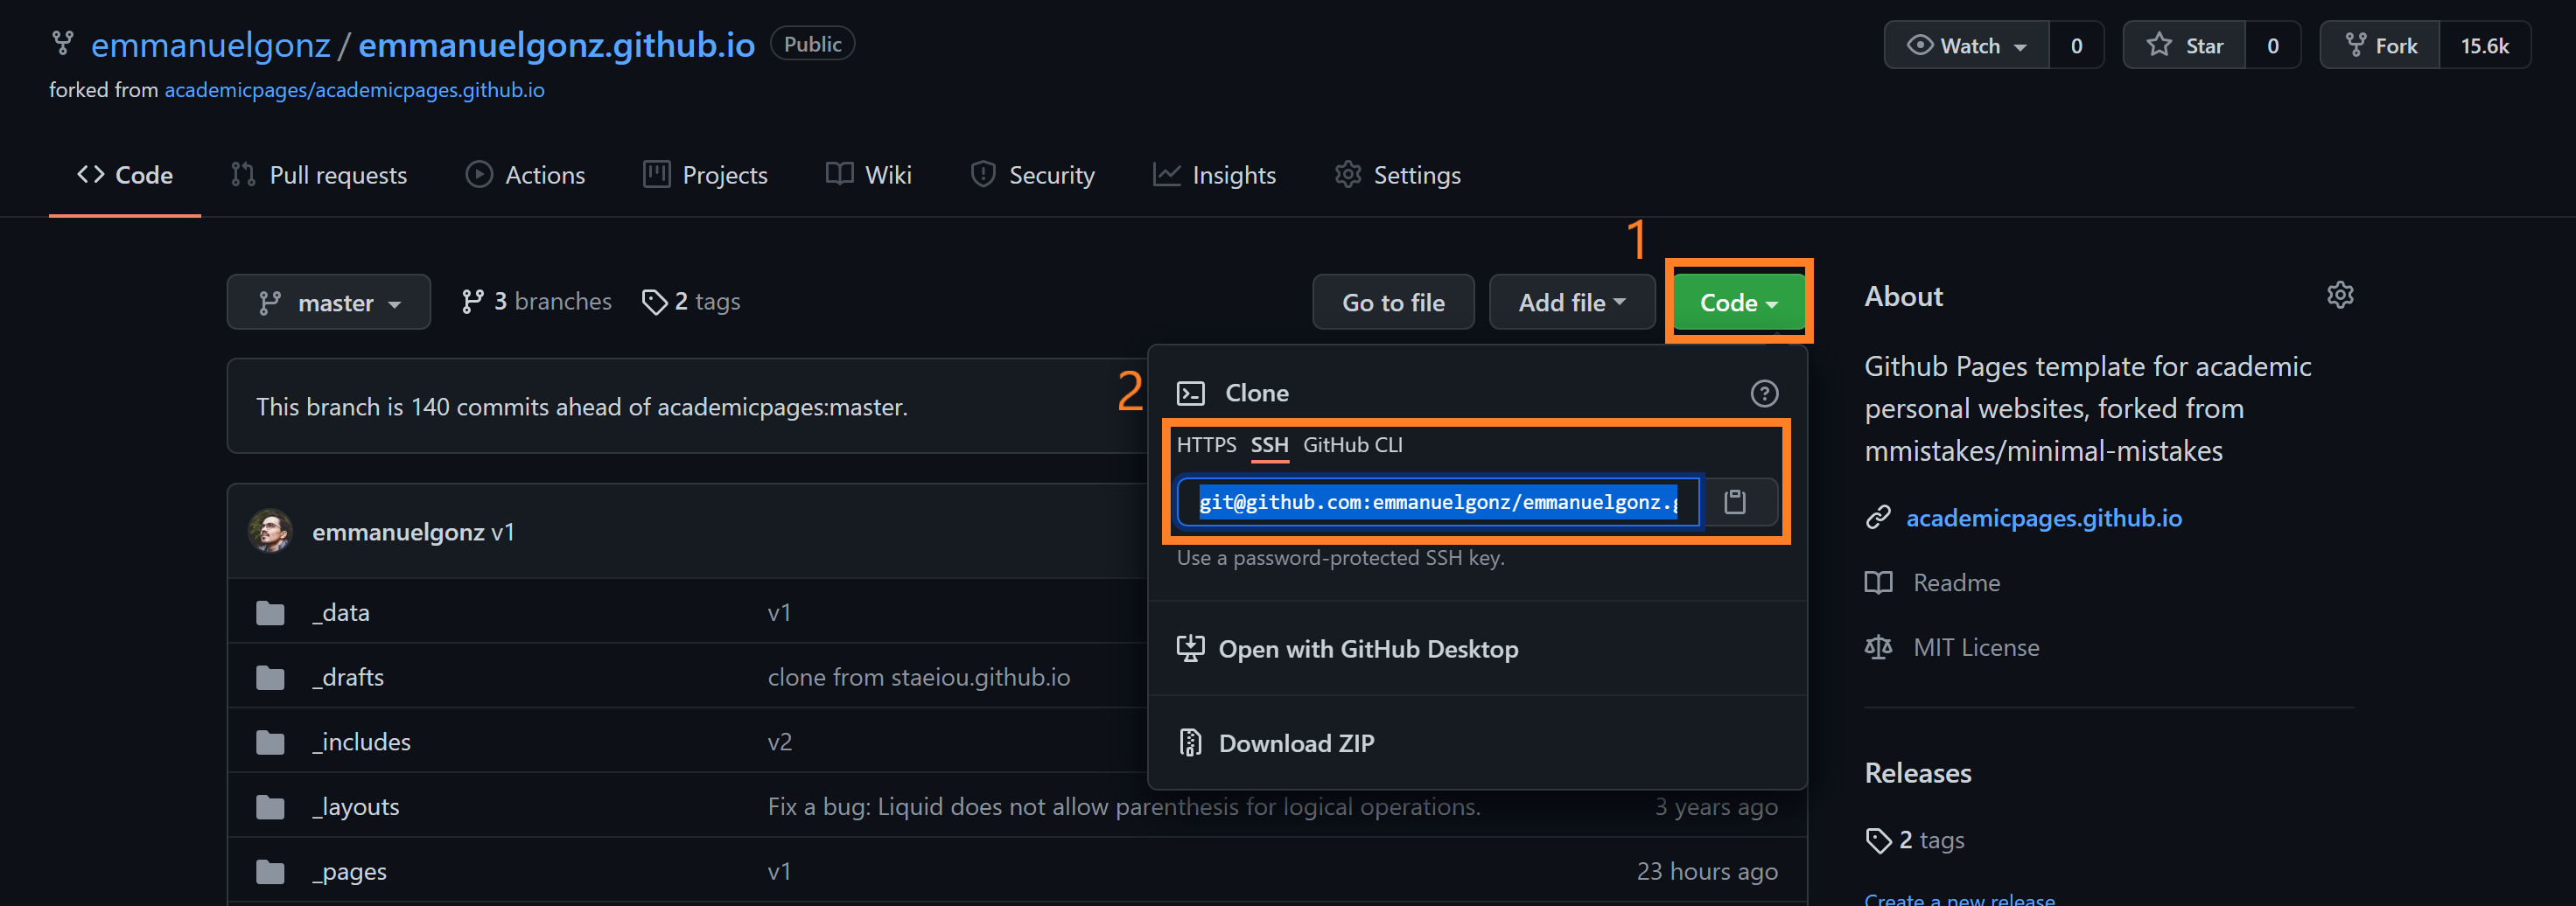
Click on the green “Code” button and copy the link to clone your own repo.
On your terminal, run:
git clone <insert link here>
About page
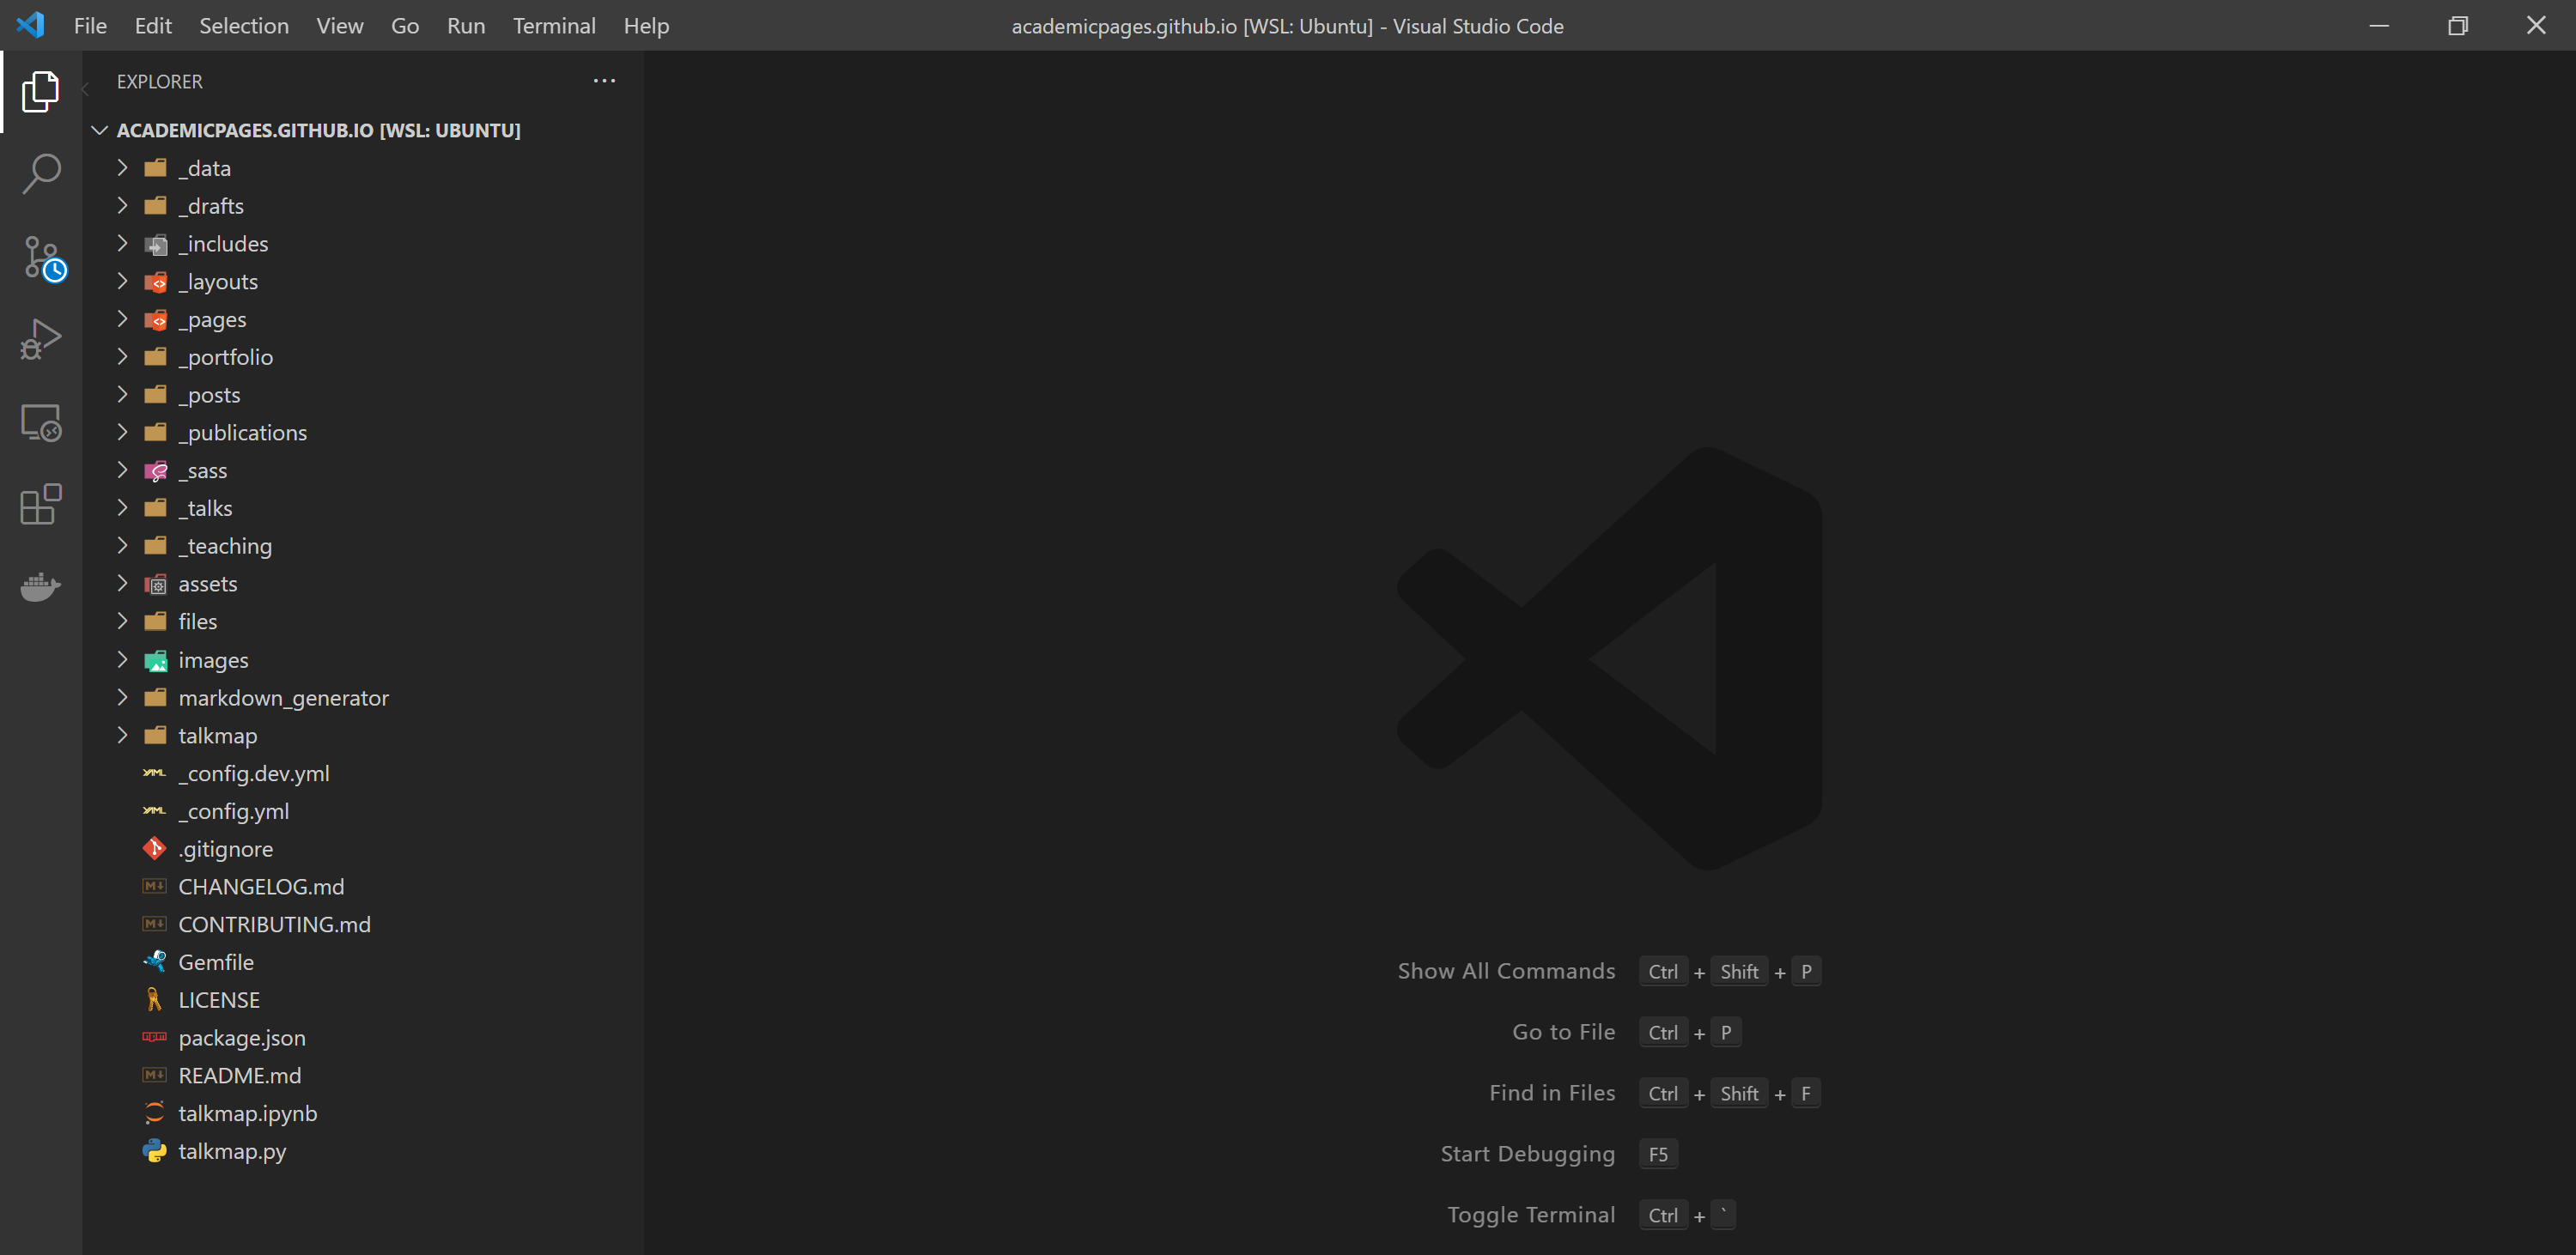
Open your integrated development environment (IDE) and open up the directory containing your cloned repo.
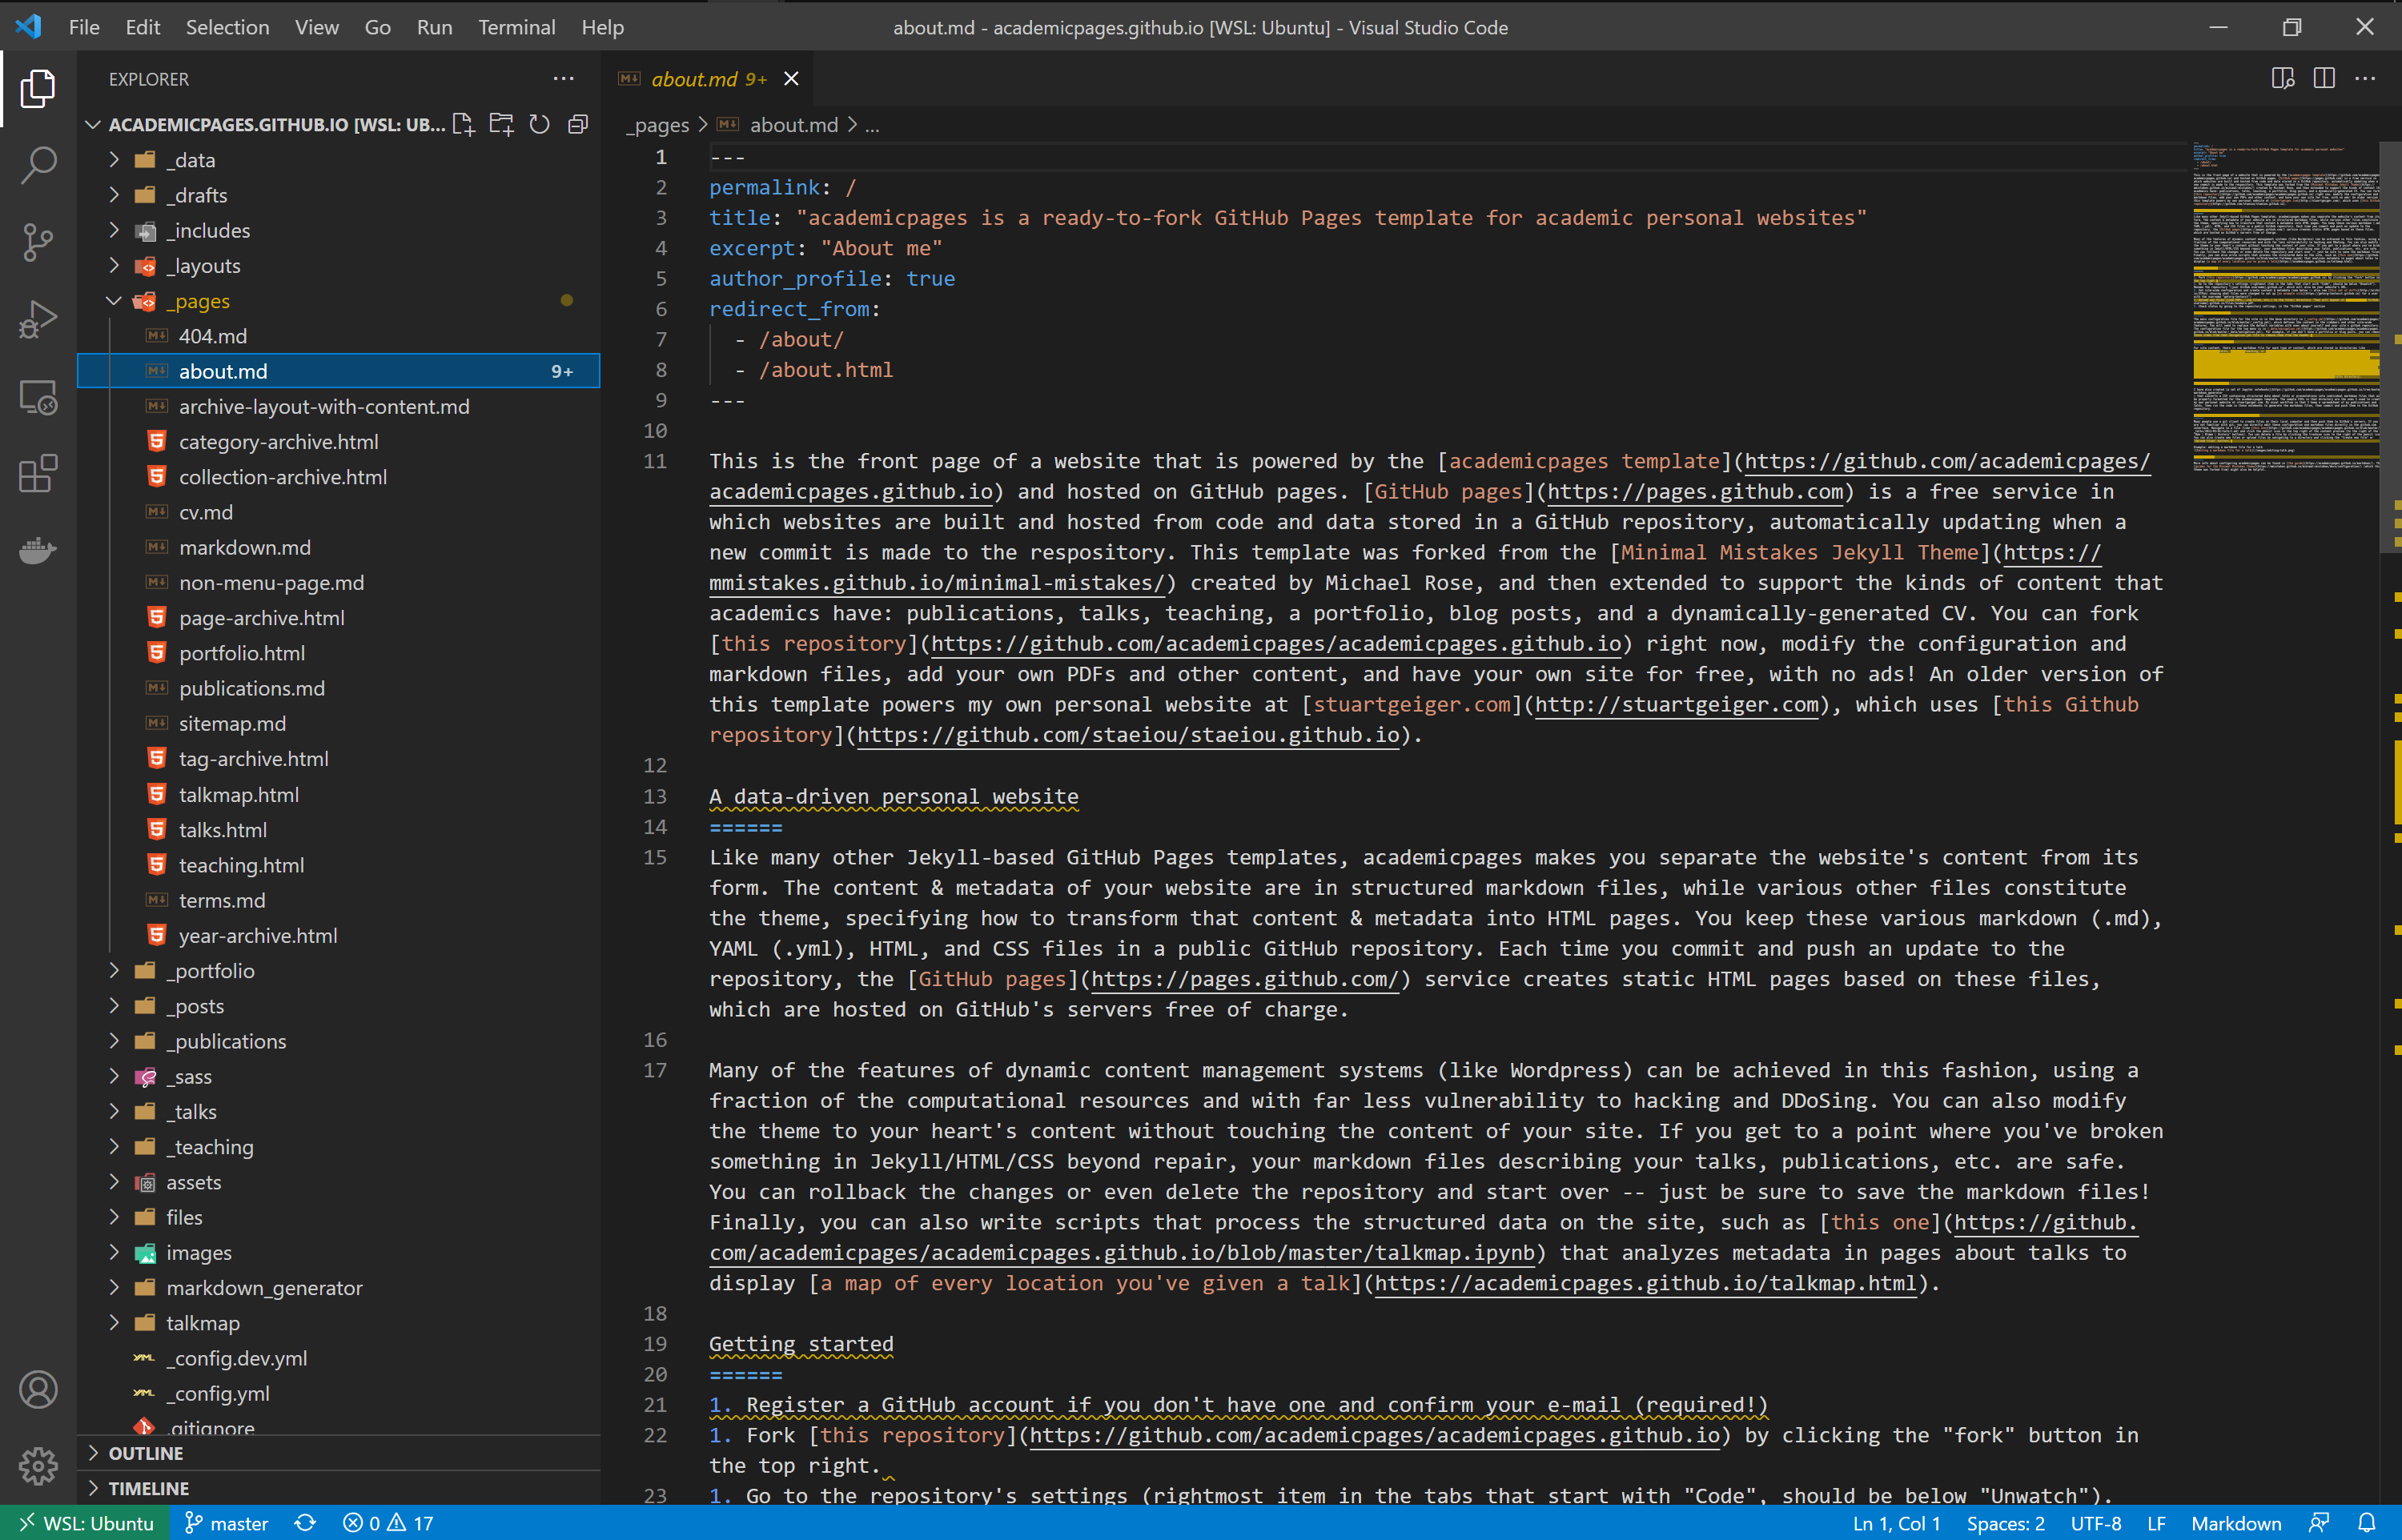
Open the _pages directory and click on the about.md file.
Remove all the text under line 9 (highligthed in blue).
Edit the header information (title, excerpt)
You can add an image by placing it in the images directory. Use the following code to include it in your page:
<img title="<fill in with caption title>"alt="Alt text"src="images/<fill in with image name>">
Add, commit, and push your changes:
git add *
git commit -m'changes to about me'
git push origin
Now, navigate to your website, which is accessible at <GitHub username>.github.io
Publications page
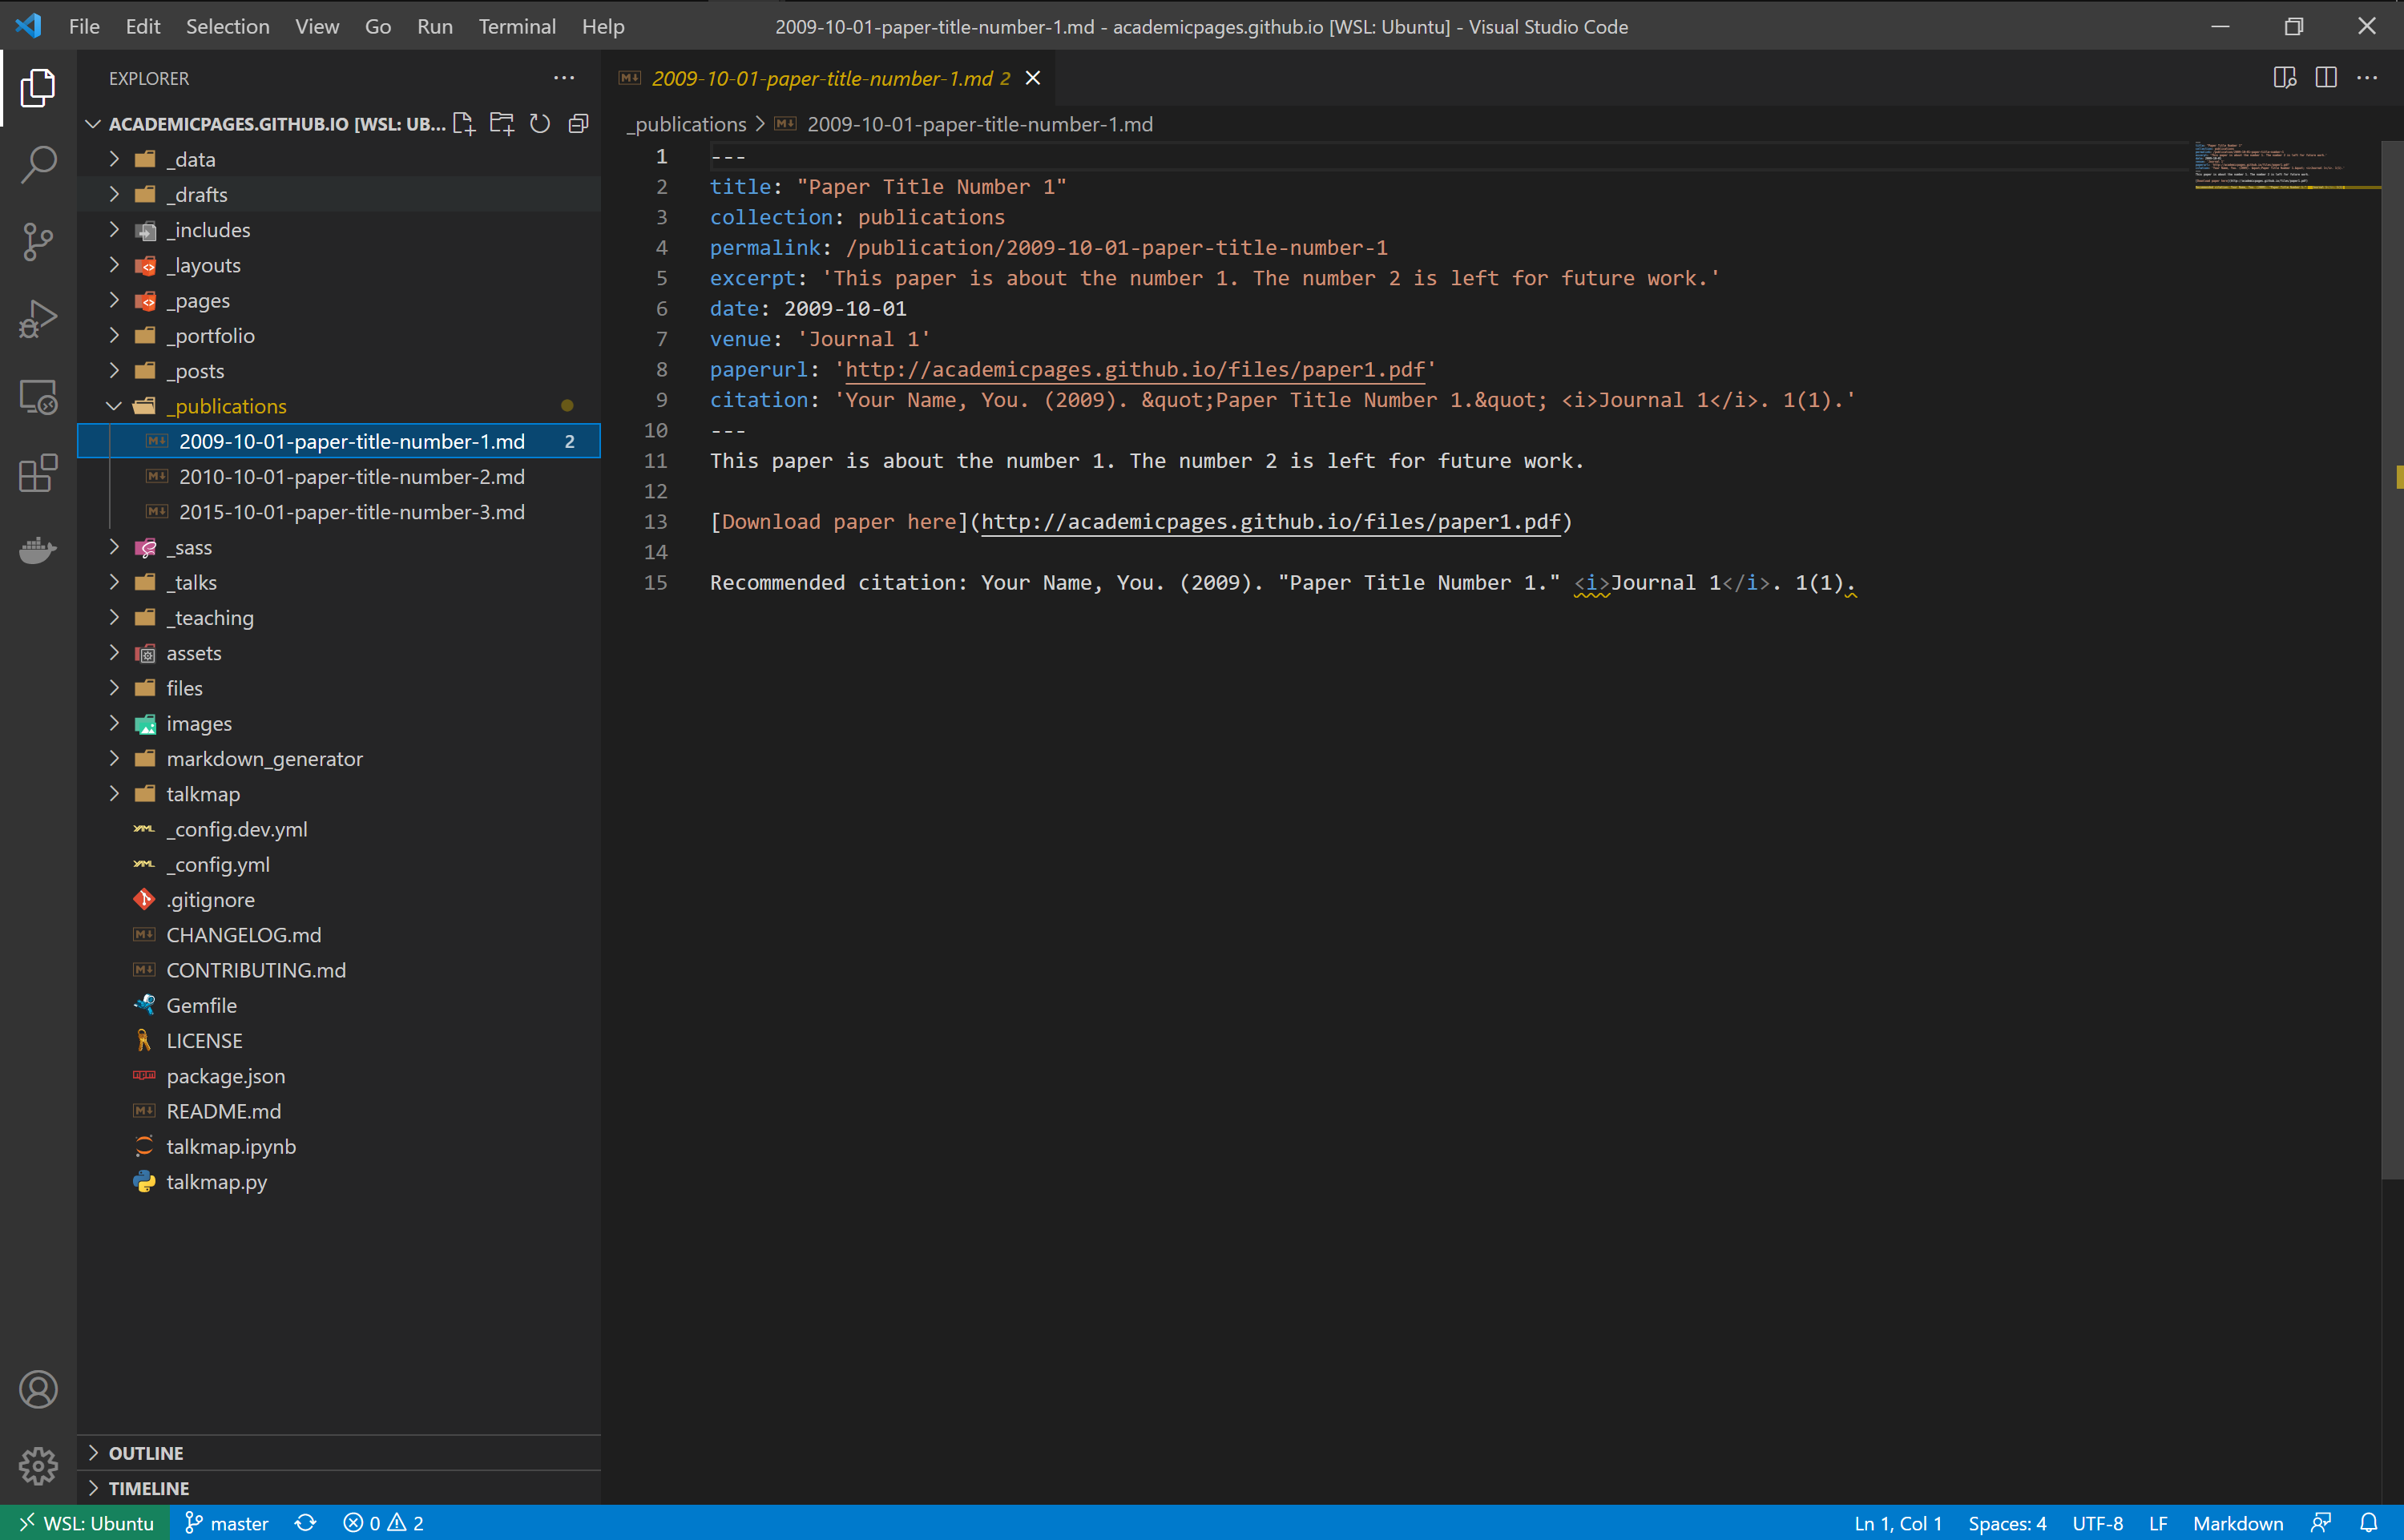
Open the _publications directory and click on the 2009-10-01-paper-title-number-1.md file.
Edit the title, permalink, etc. Example below:
Create a new file for each publication.
Add, commit, and push your changes:
git add *
git commit -m'changes to publications'
git push origin
Now, navigate to your website, which is accessible at <GitHub username>.github.io
CV page
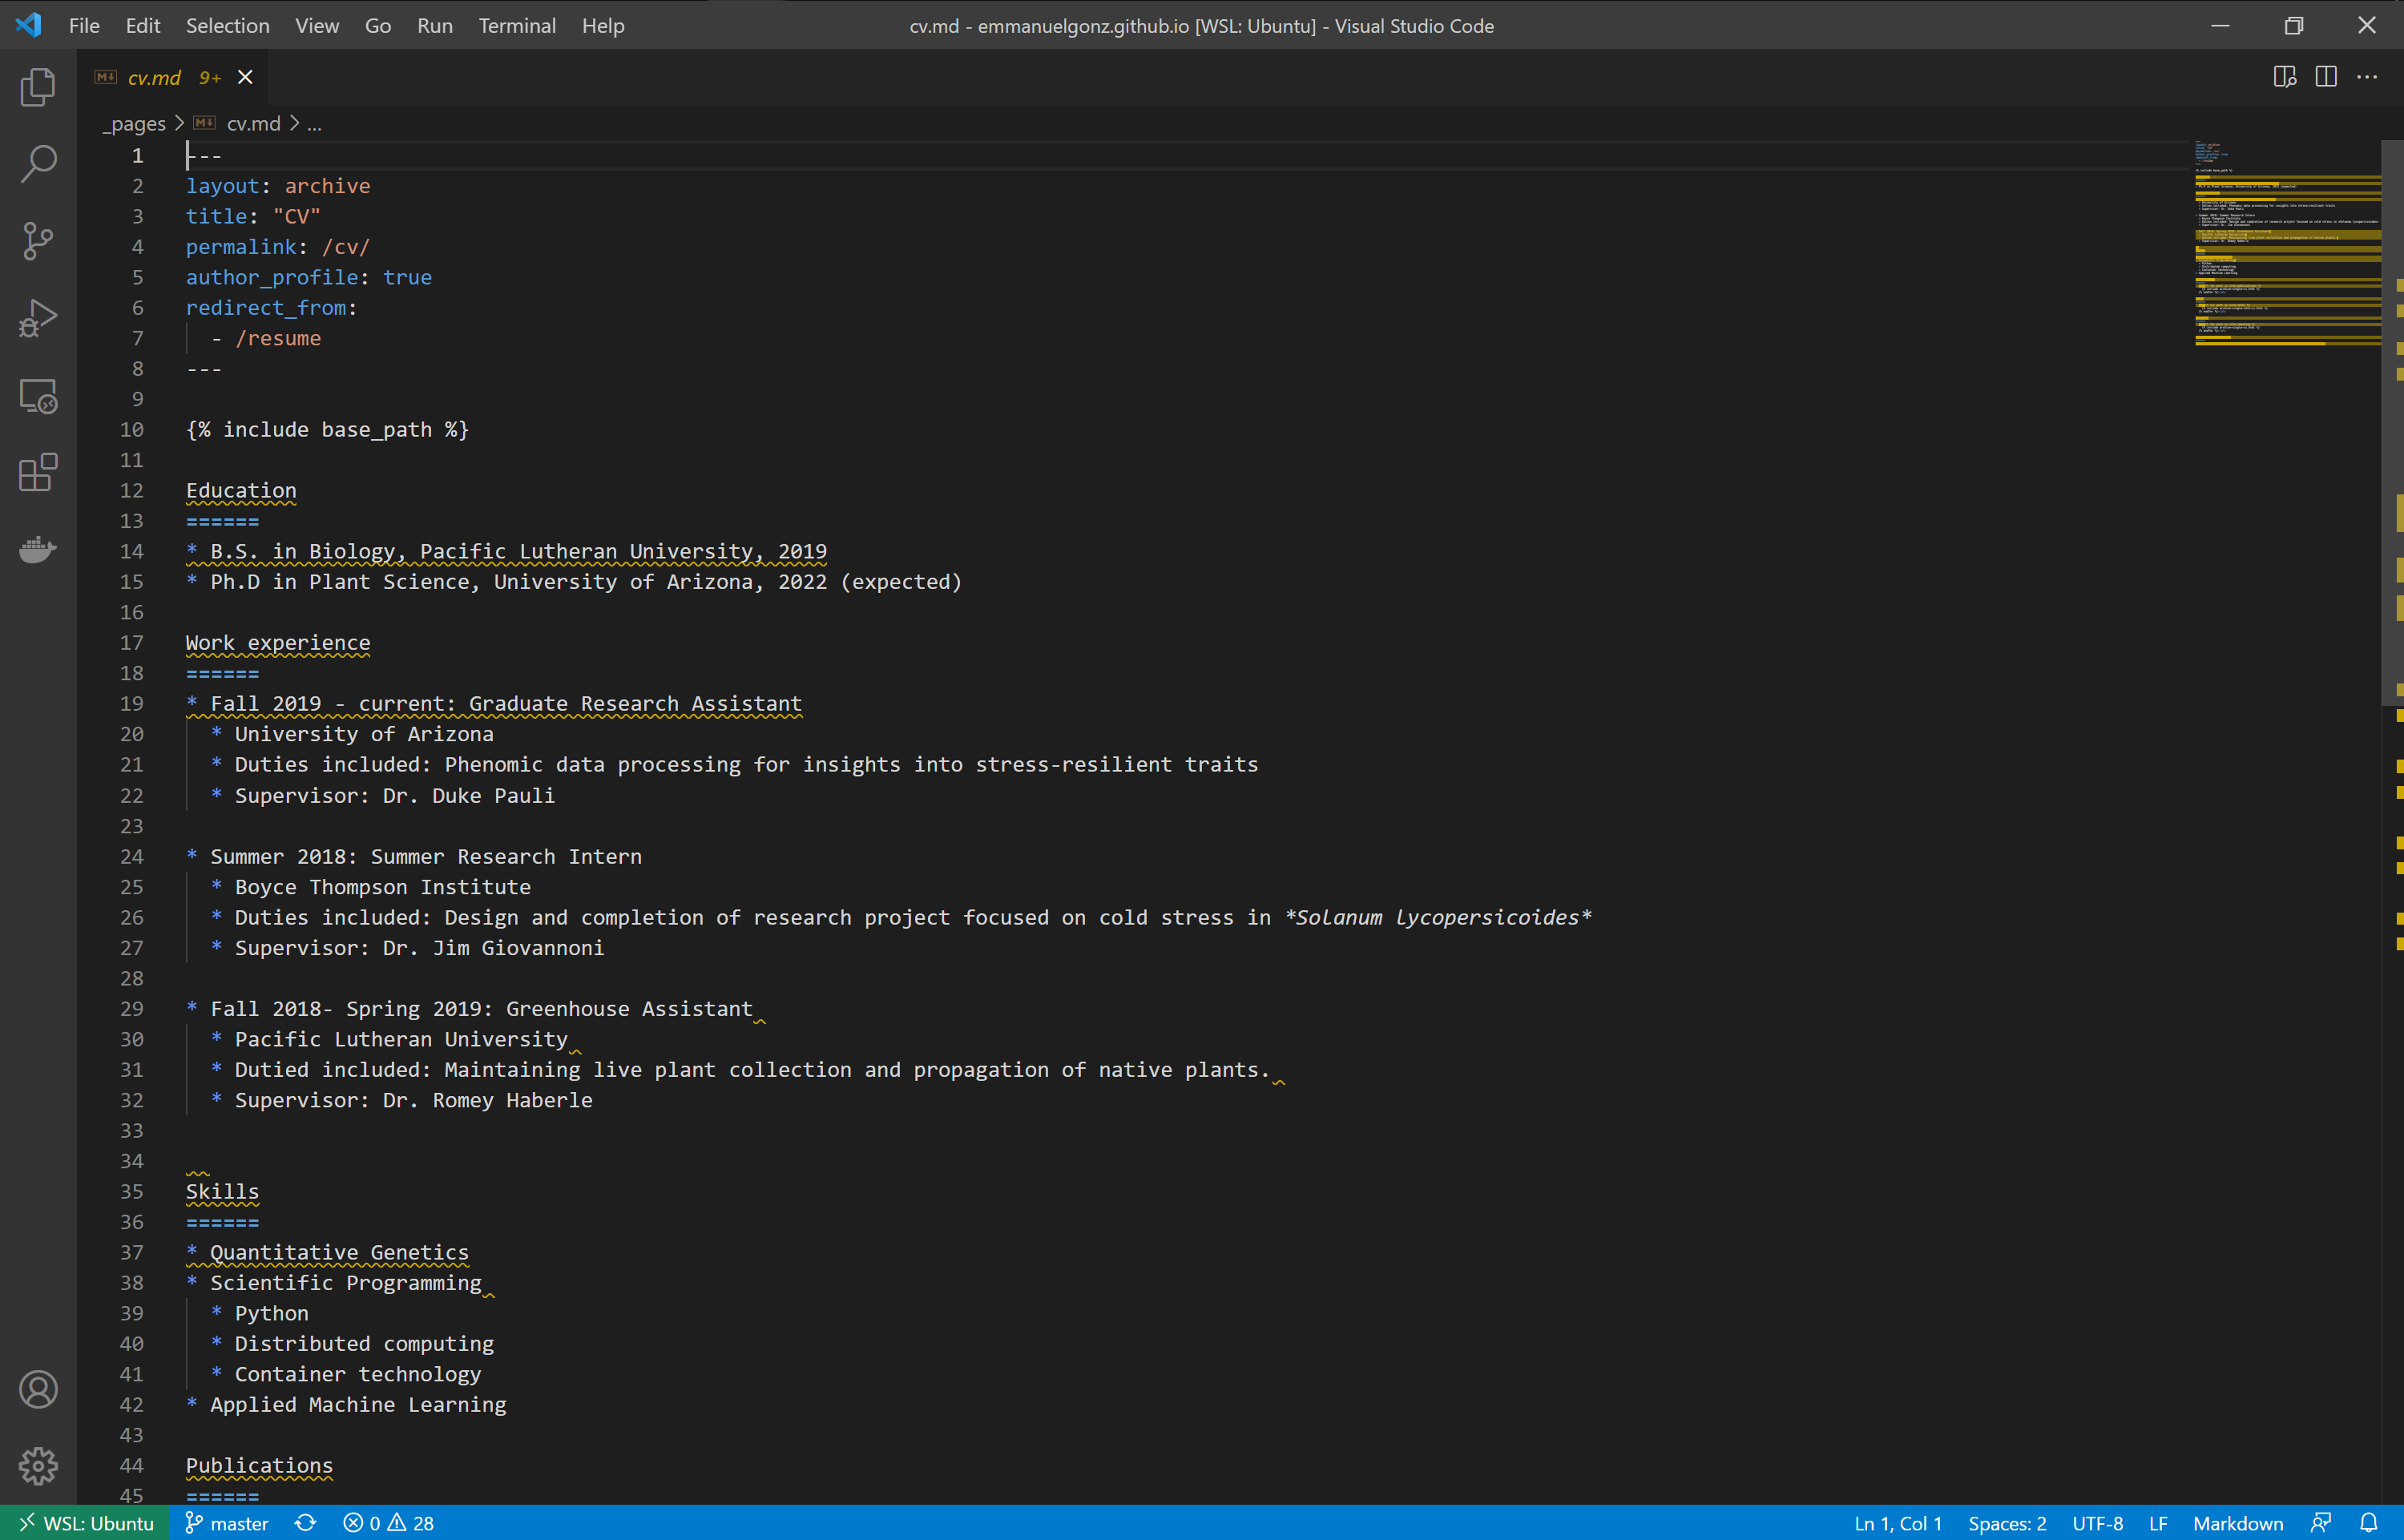
Open the Open the _pages directory and click on the cv.md file.
Add your education, work experience, and skills. Example below:
Add, commit, and push your changes:
git add *
git commit -m'changes to cv'
git push origin
Now, navigate to your website, which is accessible at <GitHub username>.github.io
]]>Yiheng Anyiheng.an.usa@gmail.comiRODS Crash Course2021-09-23T00:00:00-07:002021-09-23T00:00:00-07:00https://yihengan.com/posts/2021/09/irods-crash-courseLearn how to use iRODS for your research data management needs.
This tutorial will walk you through downloading and uploading data using iRODS.
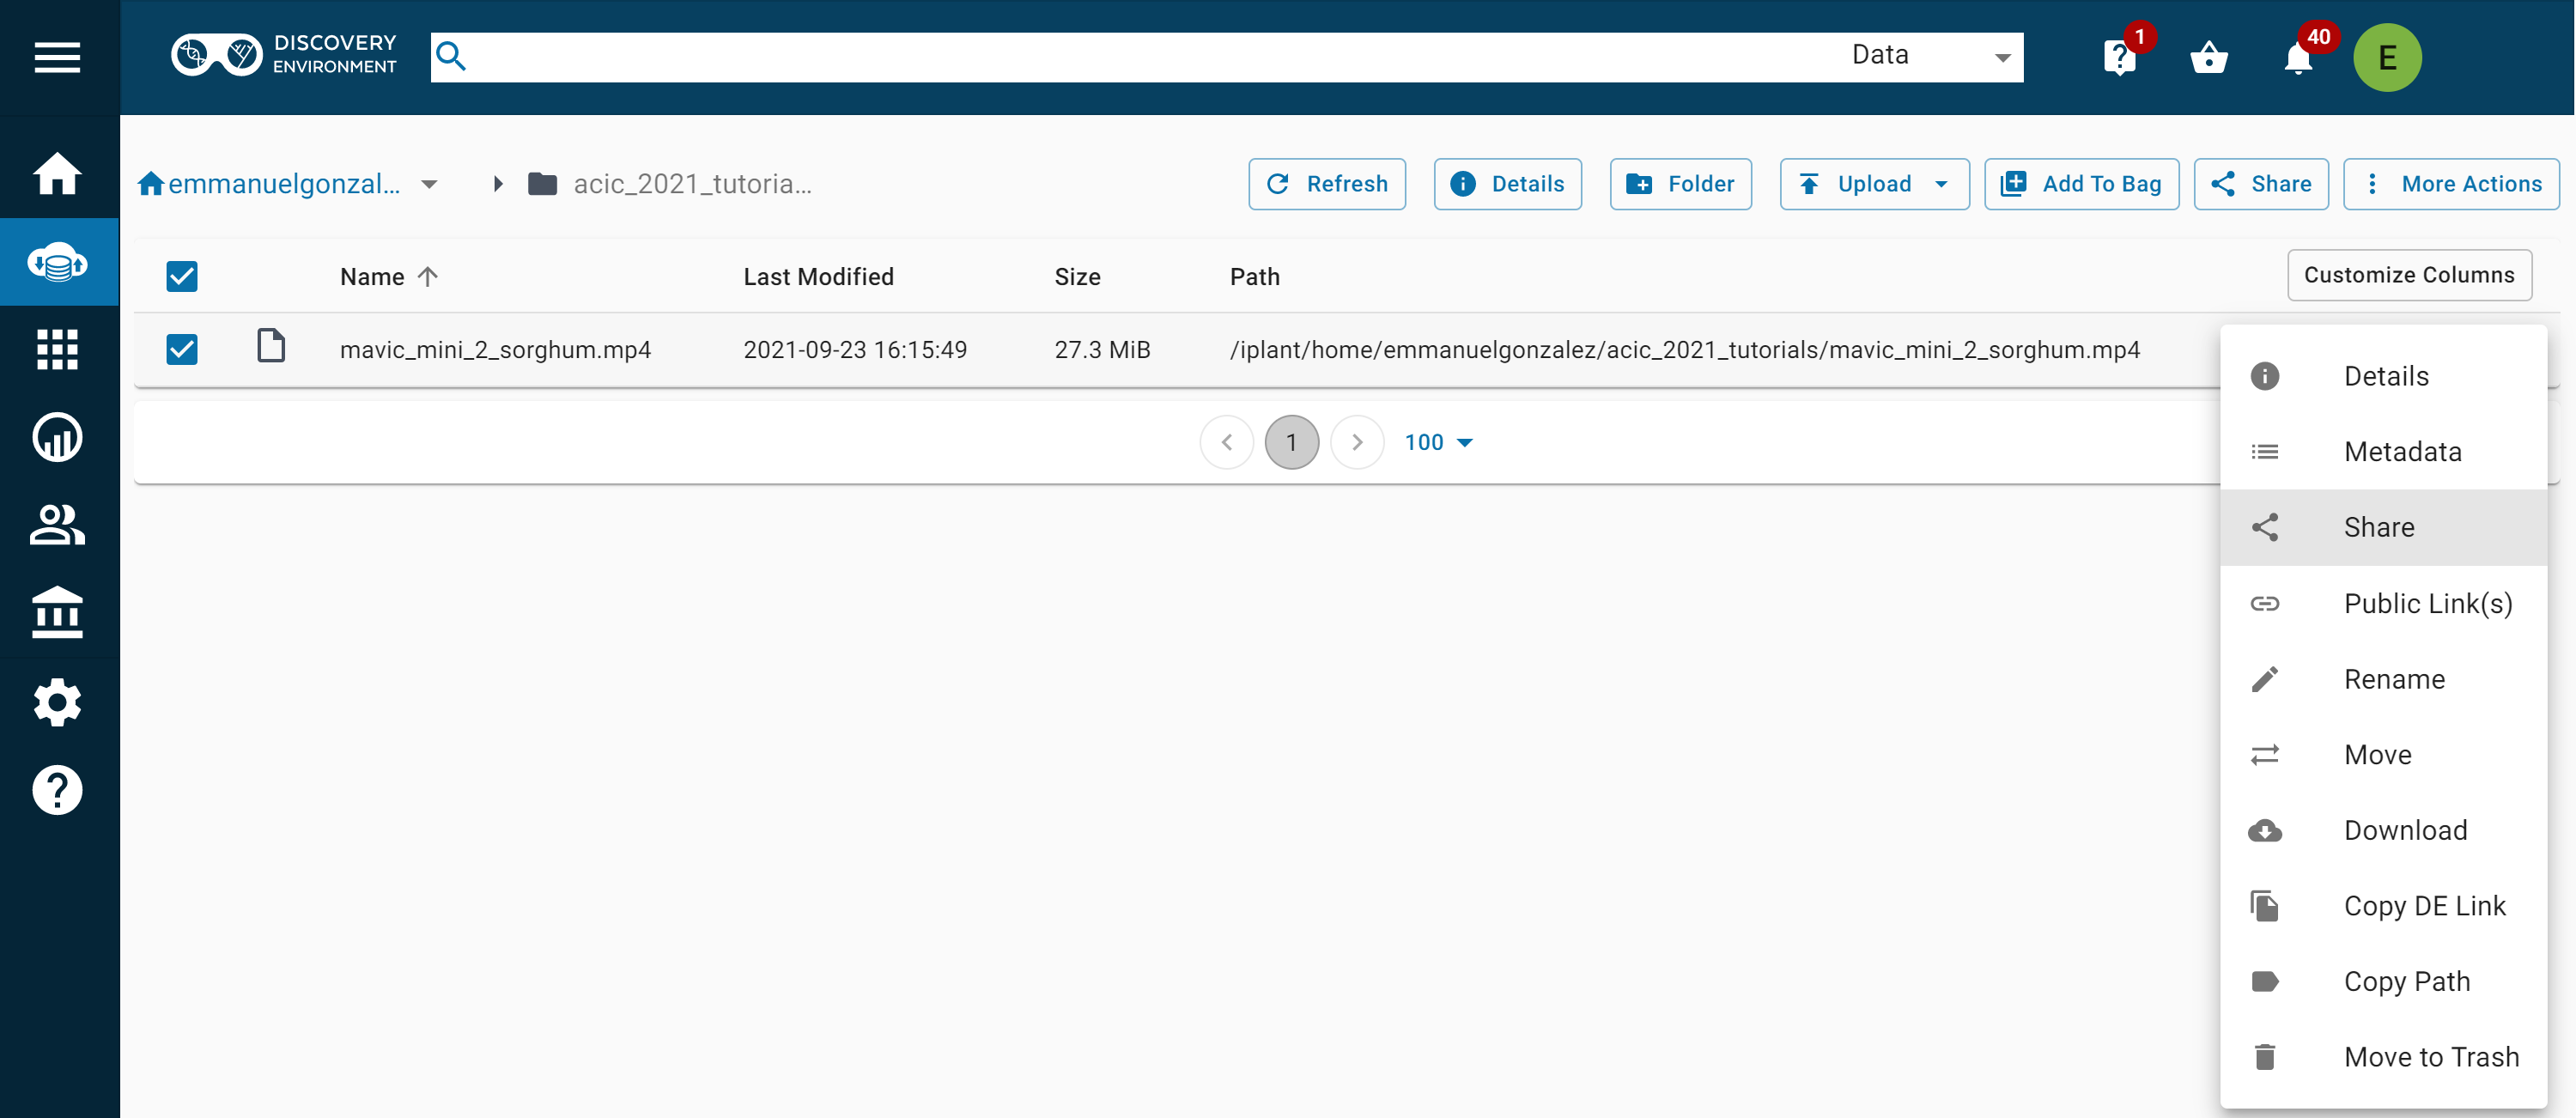
You can share a file by logging into the CyVerse Data Store, clicking on the 3 dots on the far right and clicking “Share.”
Share the file with someone present on the Zoom call.
Congratulations, you are now an iRODS expert!
]]>Yiheng Anyiheng.an.usa@gmail.comTerminal, GitHub, and iRODS Essentials2021-09-20T00:00:00-07:002021-09-20T00:00:00-07:00https://yihengan.com/posts/2021/09/terminal-git-irodsLearn how to leverage the terminal for GitHub version control and Integrated Rule-Oriented Data System (iRODS) data management!
This tutorial is split into three parts:
Part A: Terminal
Set up a Linux workspace for scientific computing.
Part B: GitHub
Build a website to share this with employers, network connections, etc.
Part C: iRODS
Set up iRODS within your terminal and upload/download data.
Note: We may run into errors during this workshop. Do not be discouraged, this is part of the workspace set up. It is painful at first, but once it’s over, it’s worth it!
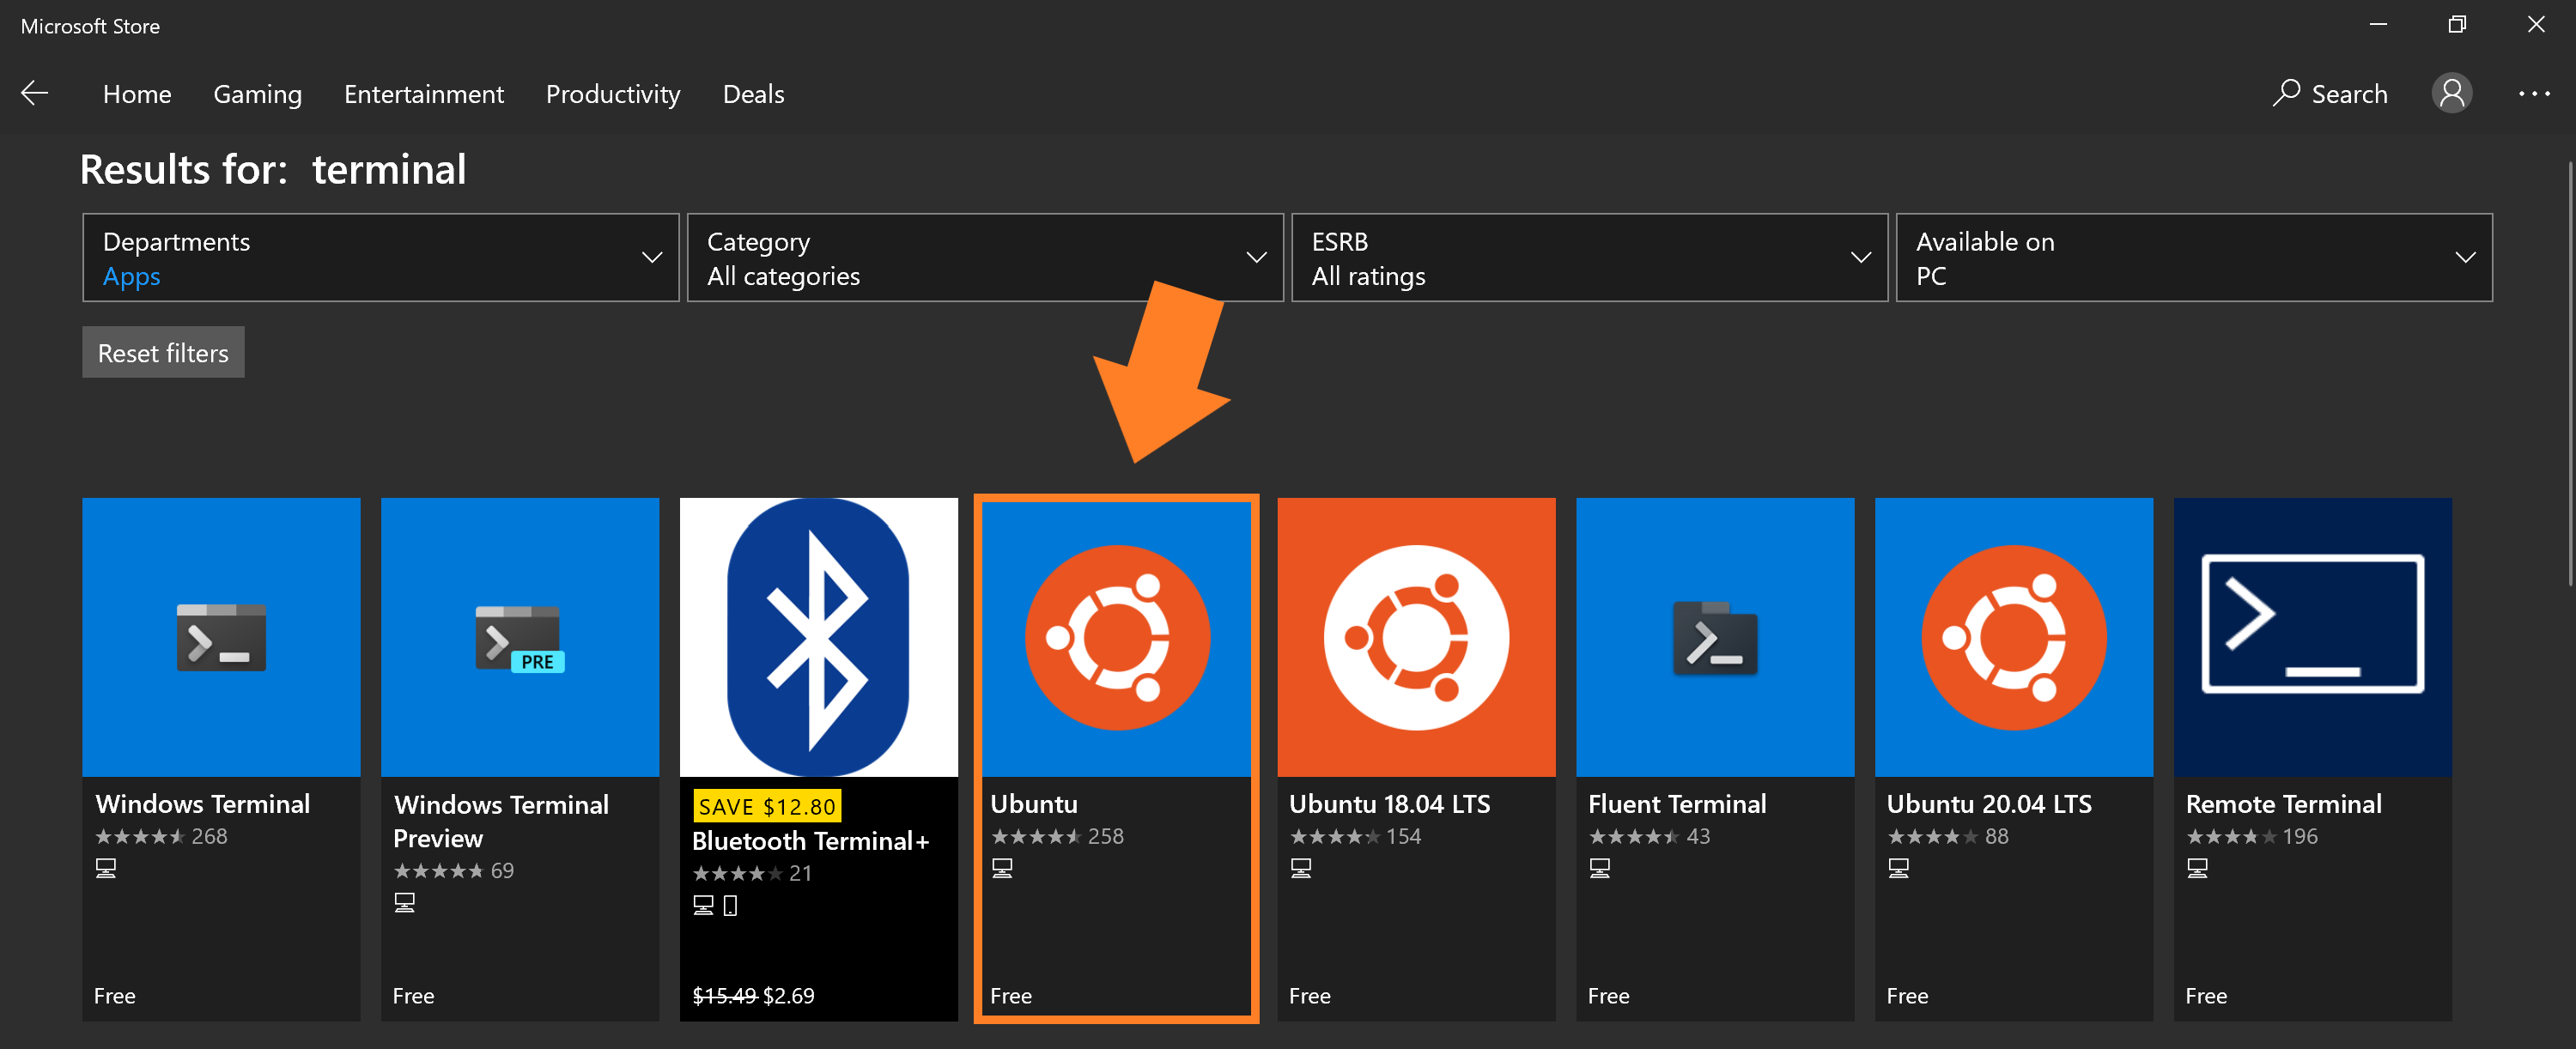
Part A: Terminal
Your terminal will look and act differently depending on your operating system (OS). There are a variety of OSs out there including Ubuntu, Windows, Mac OS, etc. Since the majority of scientific computing is done on Linux, that will be the focus of this tutorial.
macOS & Linux users
You are ready to proceed. Just open your terminal! I strongly suggest you pay attention to the Windows Subsystem for Linux 2 (WSL 2) set up, as you may find this useful when you develop for other OSs.
Windows users
We need to download and install WSL 2. I use this as my go-to workspace, as it allows me to run my code on Linux but have my computer run Windows 10. You will have a Linux terminal running on the subsystem, but your main OS will be Windows! Isn’t that cool?
Let’s get this set up on your computer by following the steps below: